On this page
View Events
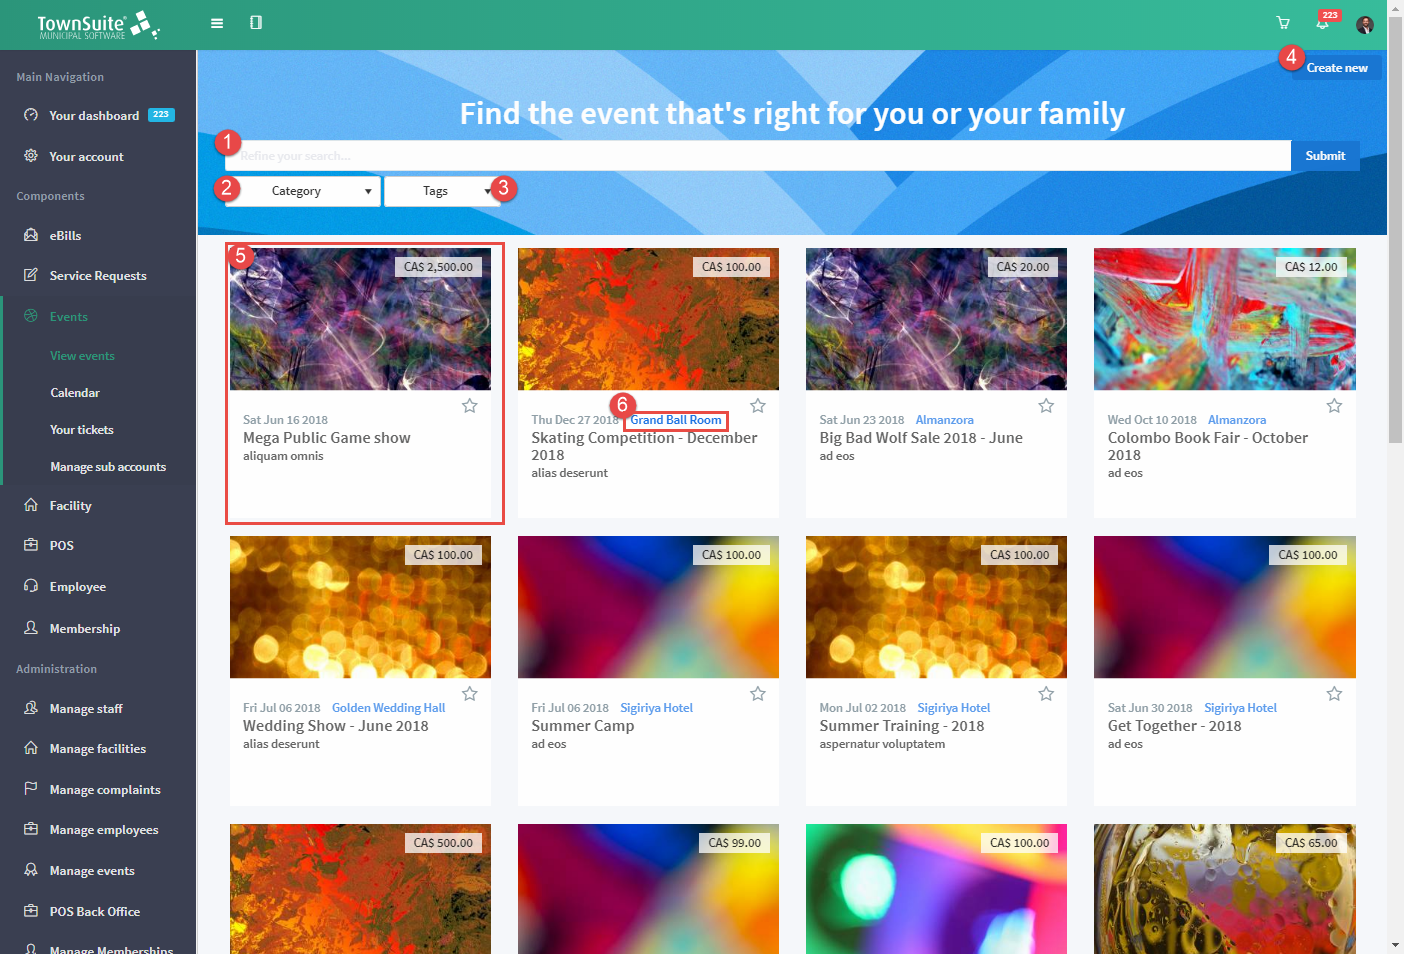
This page shows the events that are currently active and allows users to sign up for these events.
-
You can search for any related word referring to the events. The search options can be selected from the dropdown which consists of a scroll bar for convenience.
-
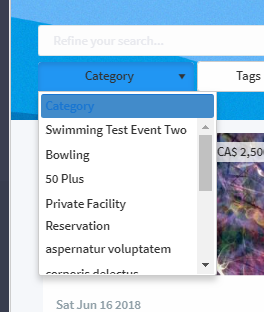
You can search by category.
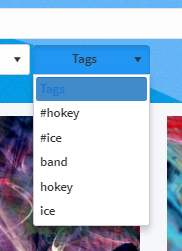
- You can search by the tags.
-
For administrator logins this button will be active and the users will be redirected to the page shown below. Refer to the Create Events heading below for the page functionality.
-
This section displays the main details of the event such as an image/placeholder, date, price of an individual ticket, name of the event, category, etc. Users will be redirected to a separate registration page when the event is clicked.
-
The Place link redirects you to the location on the map.
-
The Info Only label will be displayed on events that have been created only to provide information.

- In case there are no search results a meaningful message will be displayed.
Create Event
A new event can be created using this option. This page includes details such as:
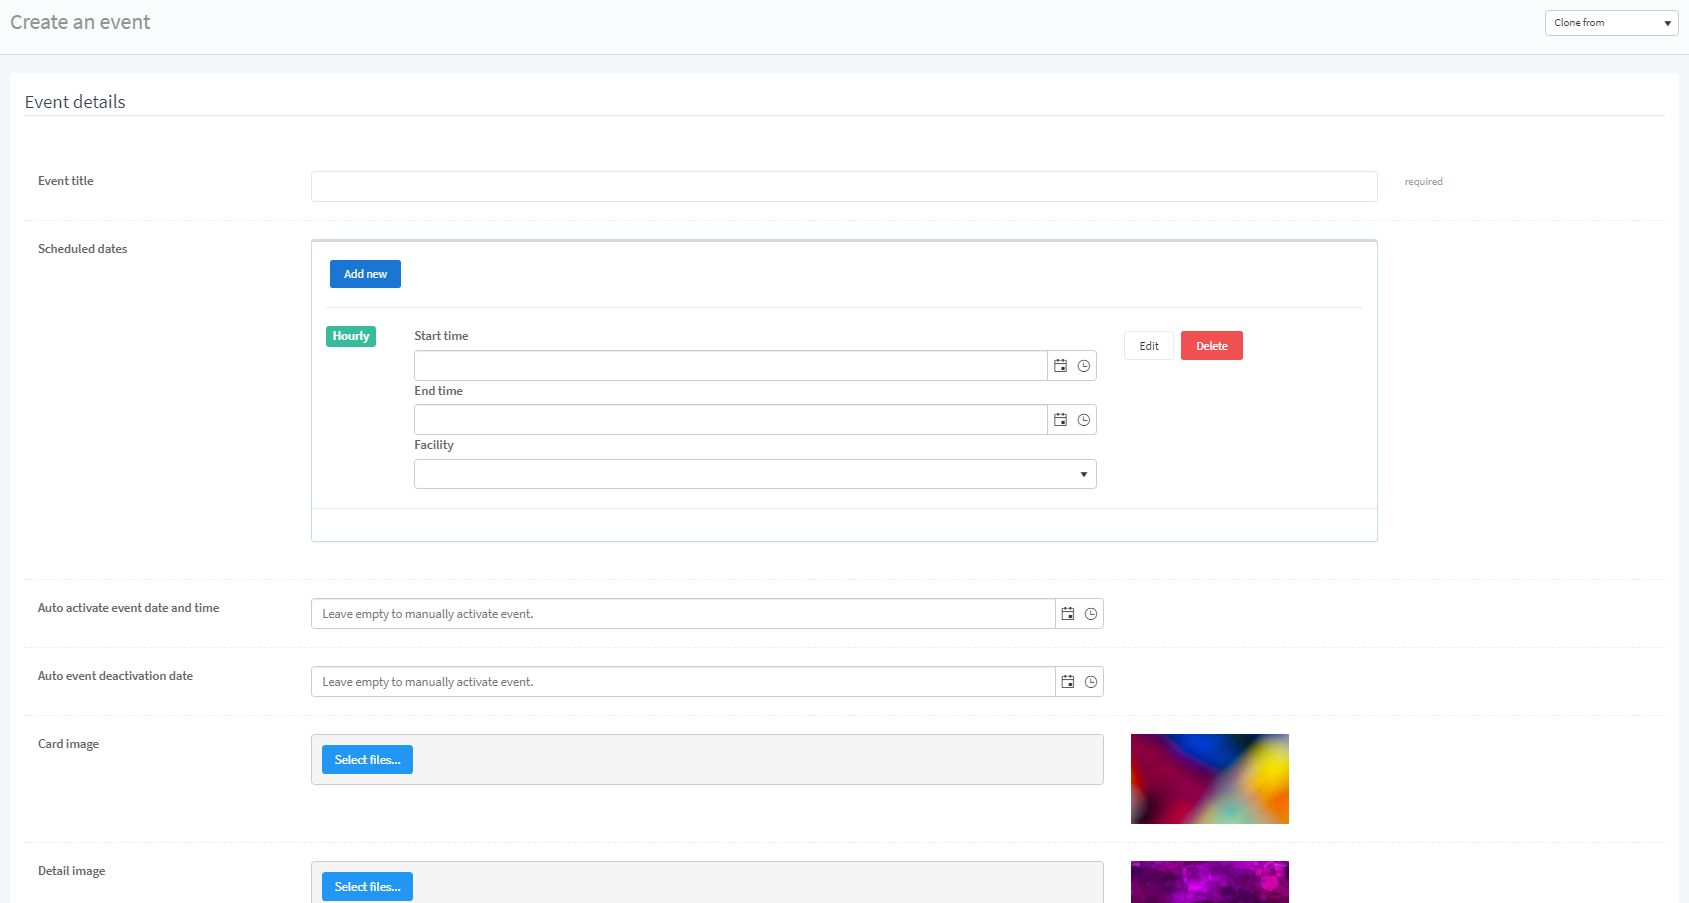
Event Details
- Event Title - enter a suitable title for the event
- The scheduled dates can be included if the event takes place with intervals, then the Add New Button can be used to add more start and end times.
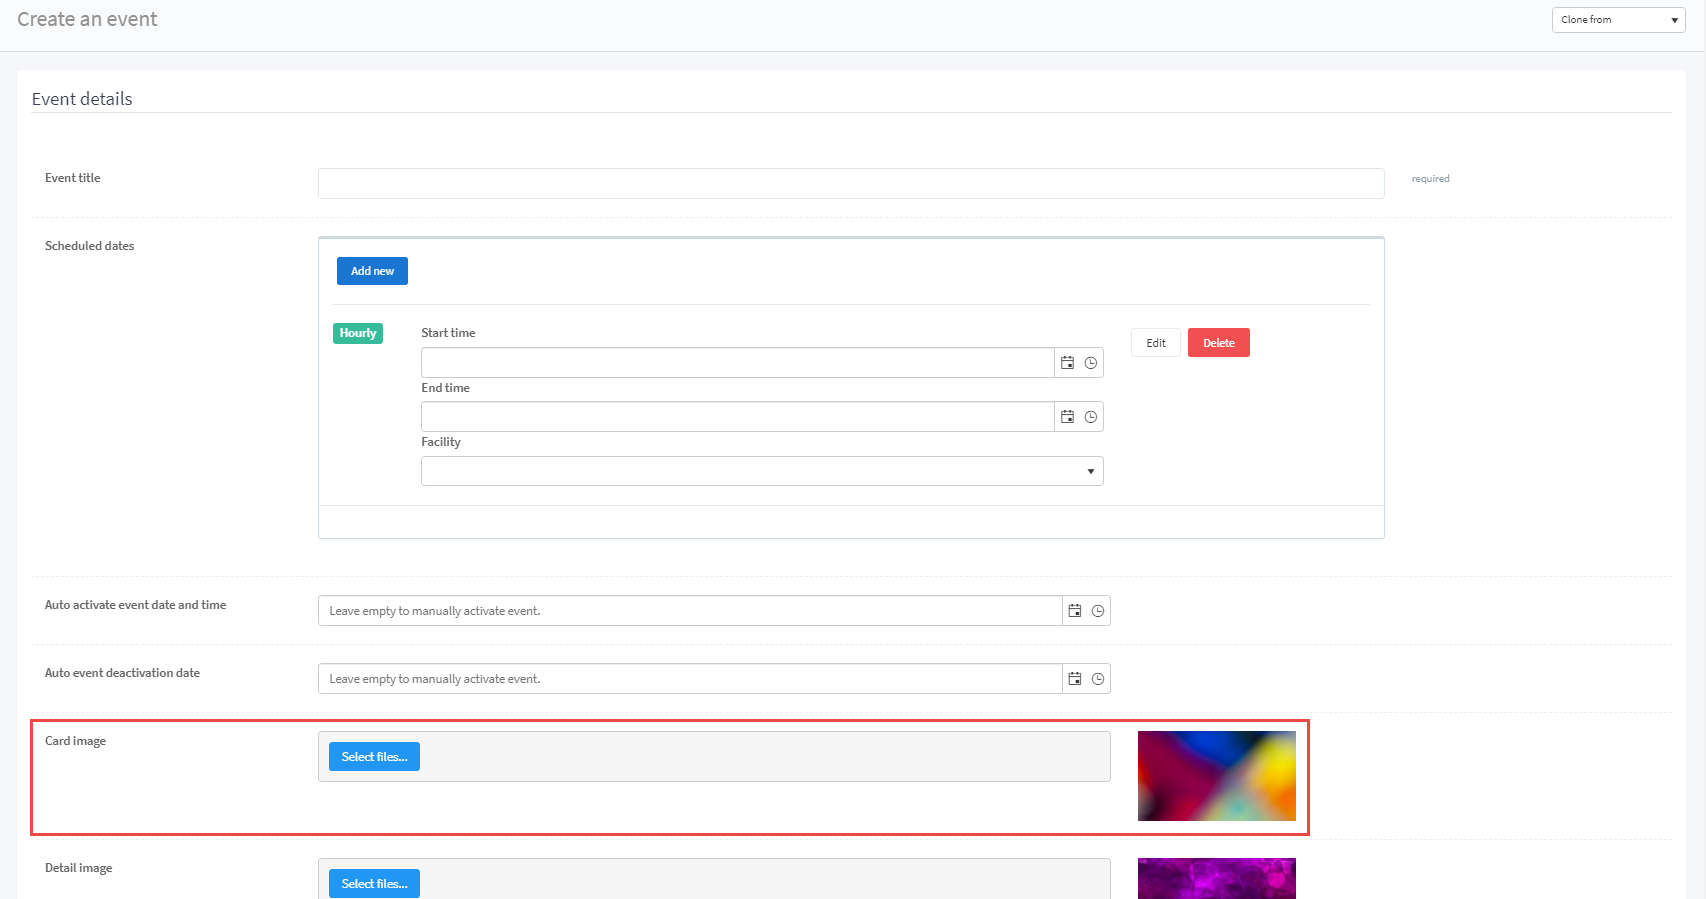
- The card image is the image which appears on the Events page
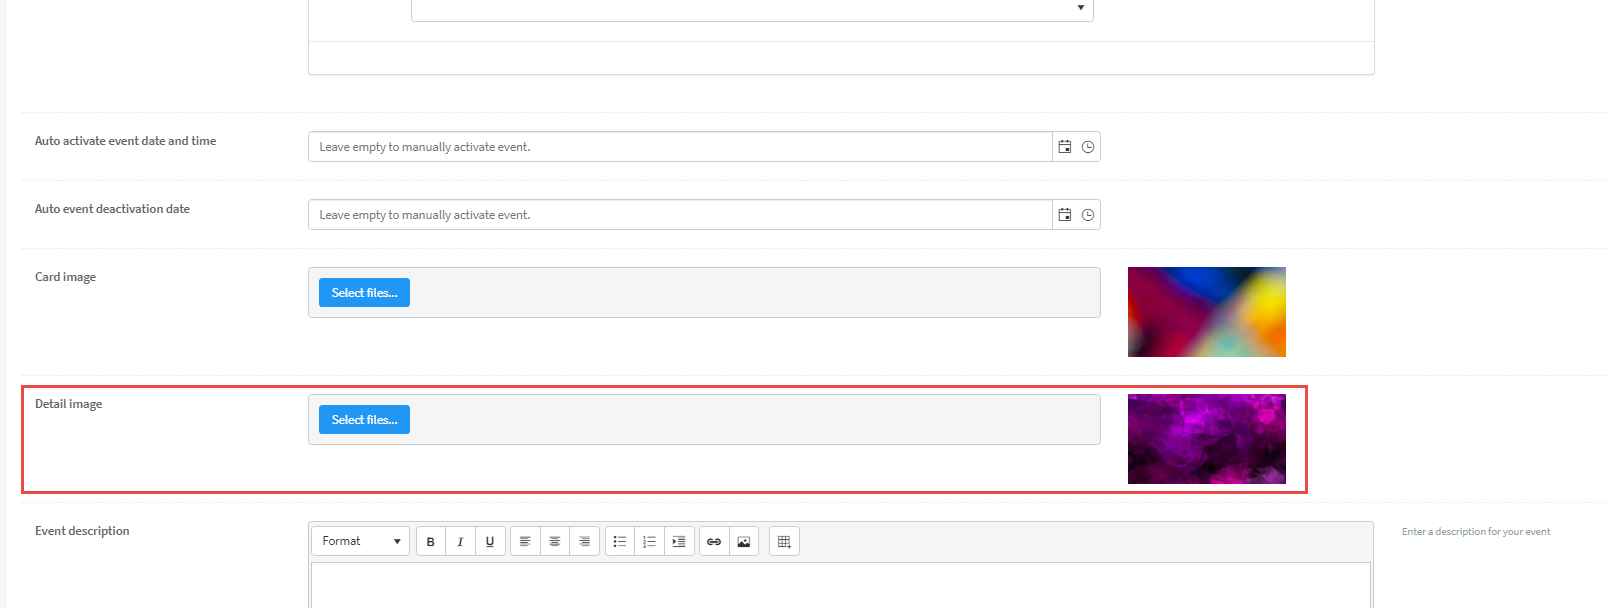
- Detailed image is the image which appears as a banner when the user clicks on the card image.
- Enter a description for the event.
- An event category and a sub category can be selected from the dropdown. These categories are used to support similar groupings. The dropdown includes a scroll bar which can be used to easily go through the whole list. The color code, card/detail images will change according to the selected Event Category.
- The event coordinator can be selected from the dropdown and they can view the event’s dashboard, view reports for the event, and scan tickets for the events.
- Invoice codes are used for taxes and will link with the Finance system.
Advance Options
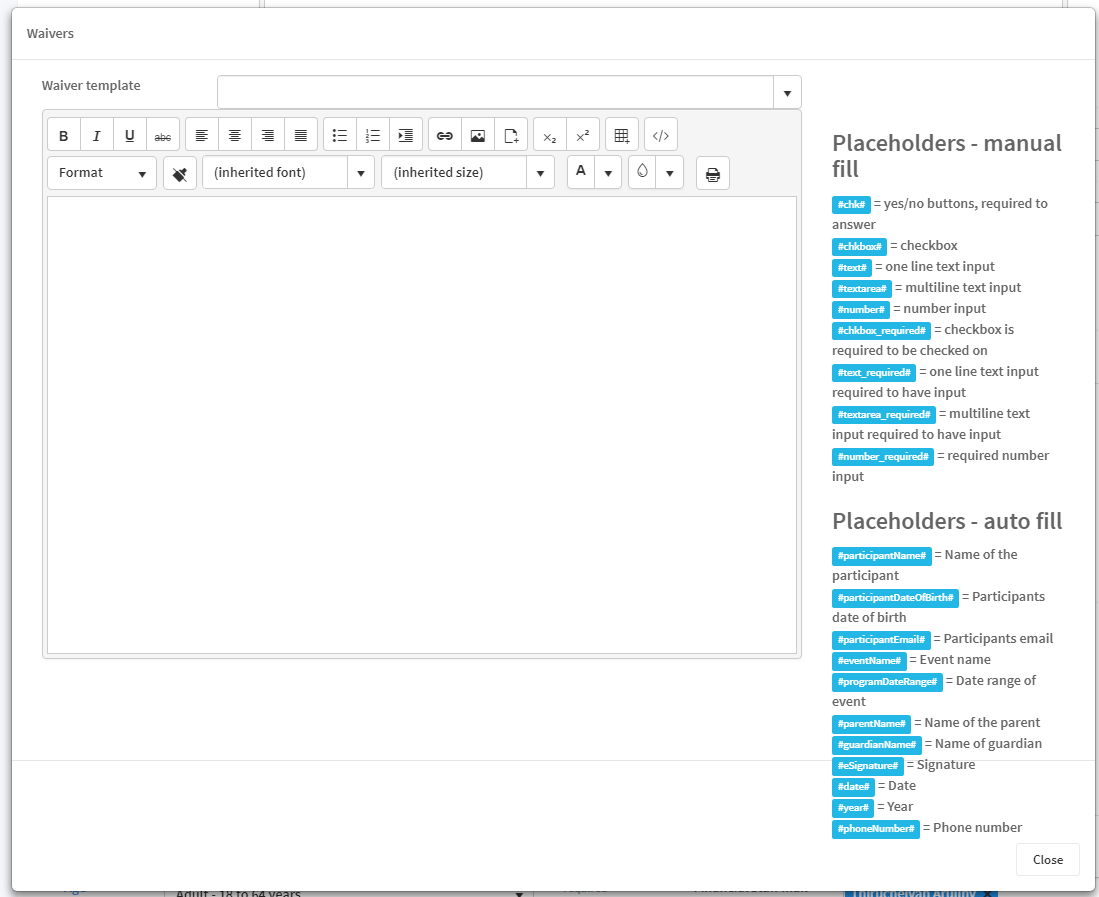
In the advance options there are four types: Event Waivers, Event Seating, Early Access, and Attachments. The Event Waivers option will display a pop up and the combo box at the top will display the existing templates which the user can select and edit.
a. Event Seating allows the user to select and edit the seating layout from which citizens can select a seat for event. The layout can be customized as required.

Select a desired seating layout & click Edit Layout.
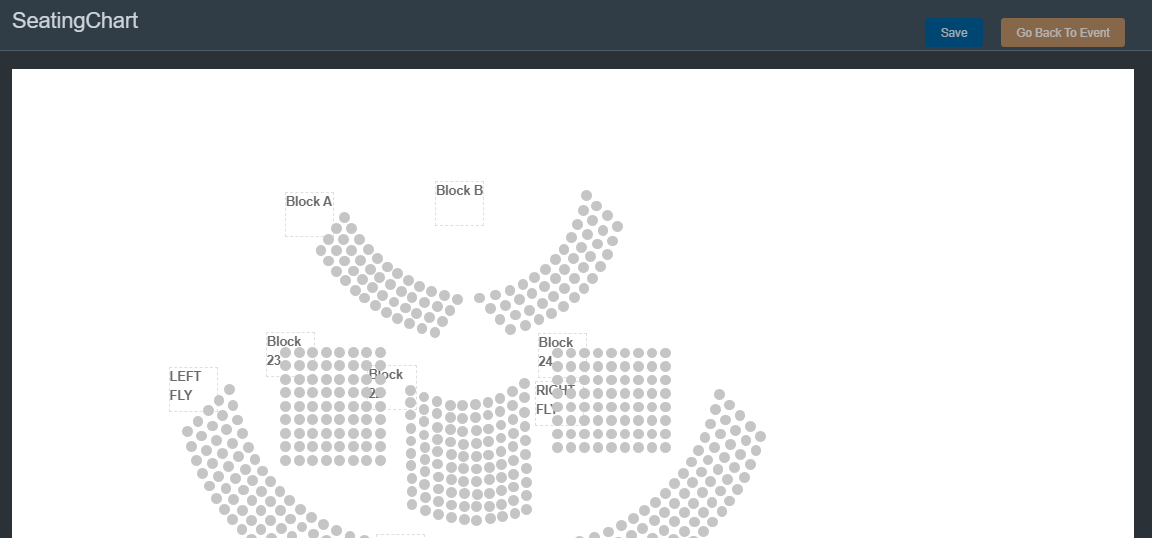
It is possible to section the ticket types for each section by double clicking on the group of seats.
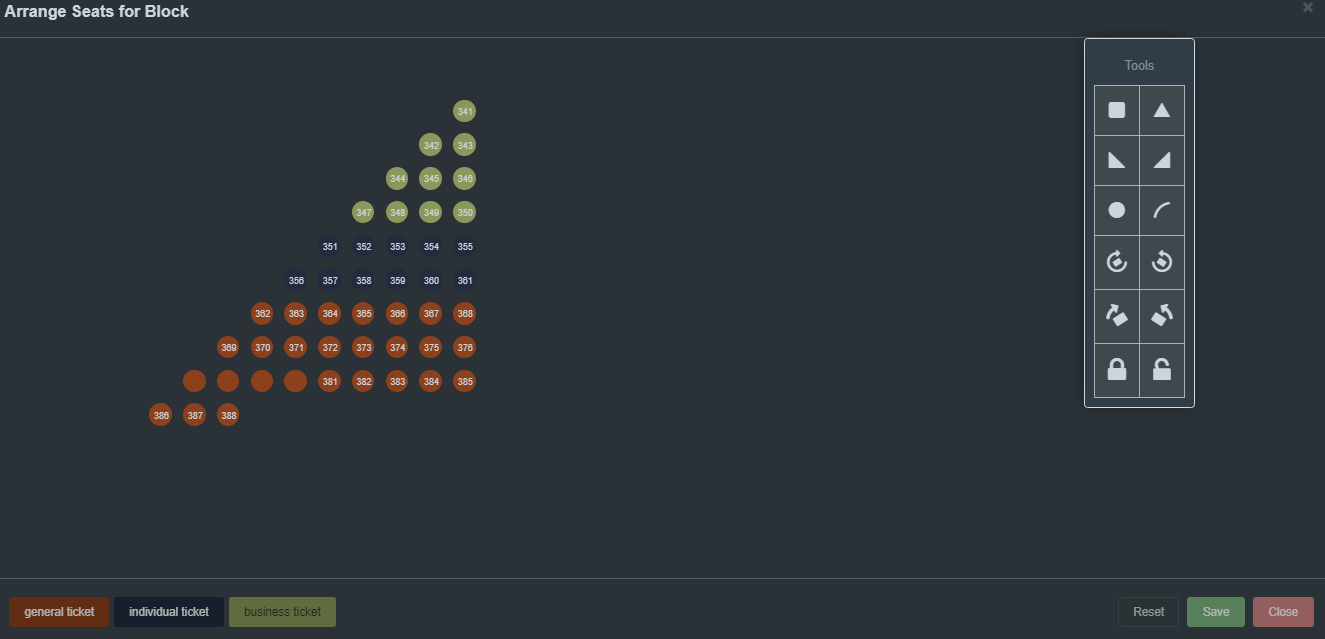
It is also possible to add components other than the seats to increase the understanding of the user.
Click Save once you complete editing.
Next, click the Go Back to Event button on the seating chart.
b. The Early Access option will allow the user to set dates for different members to make their early event bookings. This option will be auto activated.
c. Attachments can be sent along with the emails sent to the client.
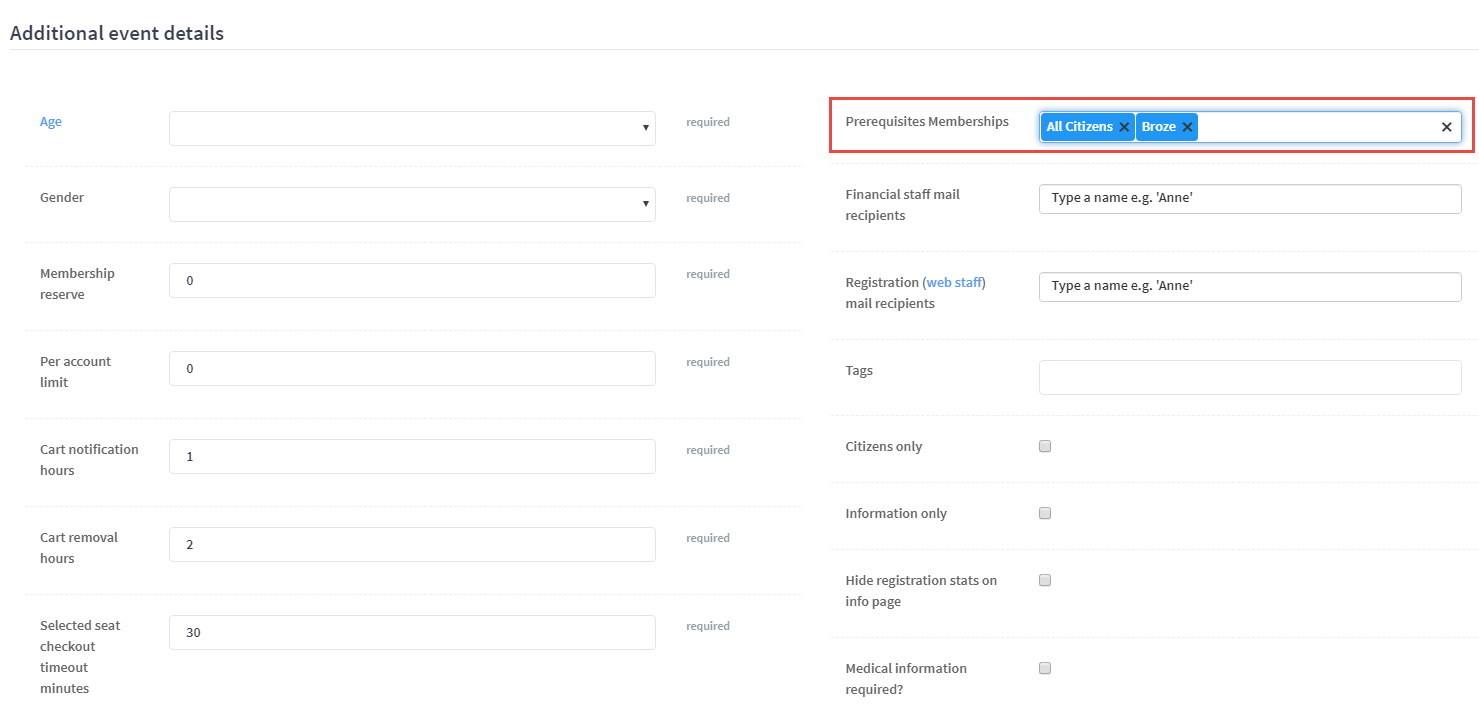
Additional Details
-
The Additional Details section allows you to set an age category for the event. Furthermore, the word Age links to a page where you can create an age group.
-
The gender can be picked.
-
The Membership Reserve is the number of tickets that are reserved for a member.
-
Per Account Limit indicates the number of tickets that can be purchased by a single account.
-
Cart Notification Hours is the time allowed for a user to be inactive in a cart before being sent a notification about being signed out.
-
Cart Removal Hours is the amount of time allowed for the user to keep the items in the cart. This too will end up in a notification.
-
Selected Seats will also be given a timeout period after which the user will be checked out automatically.
-
The staff linked to the Financial system will be listed in the Financial Staff Mail Recipients dropdown. For example, the staff member selected here will receive an email when a ticket has been purchased for the particular event.
-
The staff web users will be notified via email when a ticket for the particular event has been purchased. This is an optional field.
-
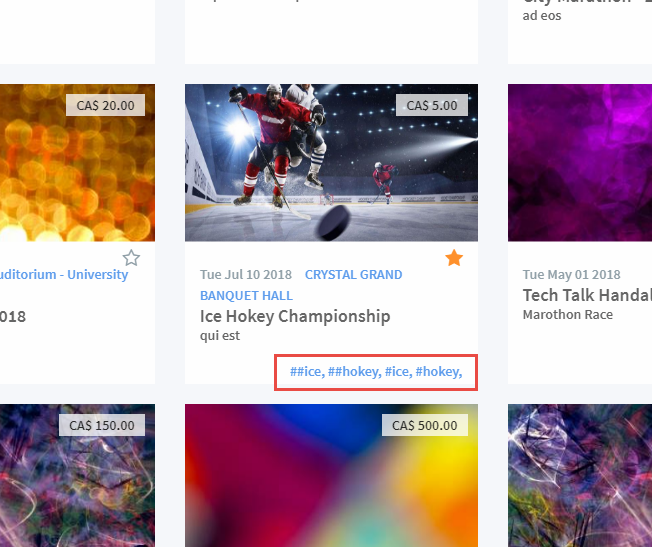
Tags are separate list of tags that can be used searching. These tags appear at the bottom of each event in the Events Page. Select the tag from the Tag dropdown or click on a tag to see the events with the same tag.
-
The check box Citizen only will limit the event ticket purchase only to citizens.
-
The Information only box will display an event only providing information with no tickets. In other words, citizens can only view the event information but they cannot purchase tickets for the event.
-
The registration statistics can be hidden from the Event info page using this check box so that citizens won’t be able to view it.

Create Tickets
There are three types of tickets: Individual which is linked to an individual account, Business which is linked to a business account, and General Admission which will only be linked to the user’s account.
Below the three types is a grid where you can add the required tickets types.
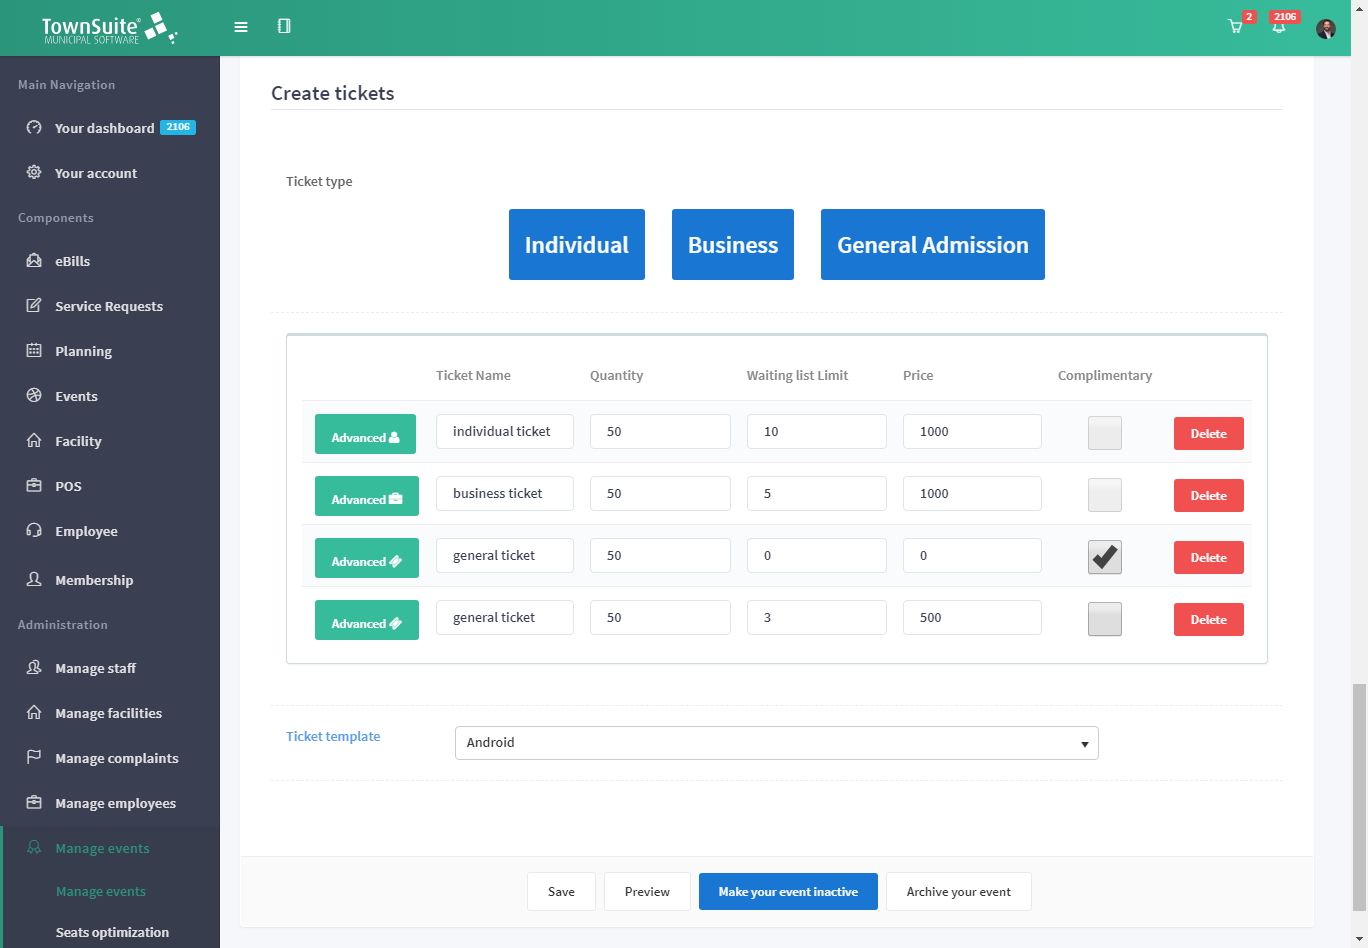
You can also have free tickets for an event. These tickets can be created from all three ticket types. Here, the price will be ‘0’ and tickets can be obtained without making any payment. Each of the ticket types are indicated with a unique icon which appears in each ticket row.

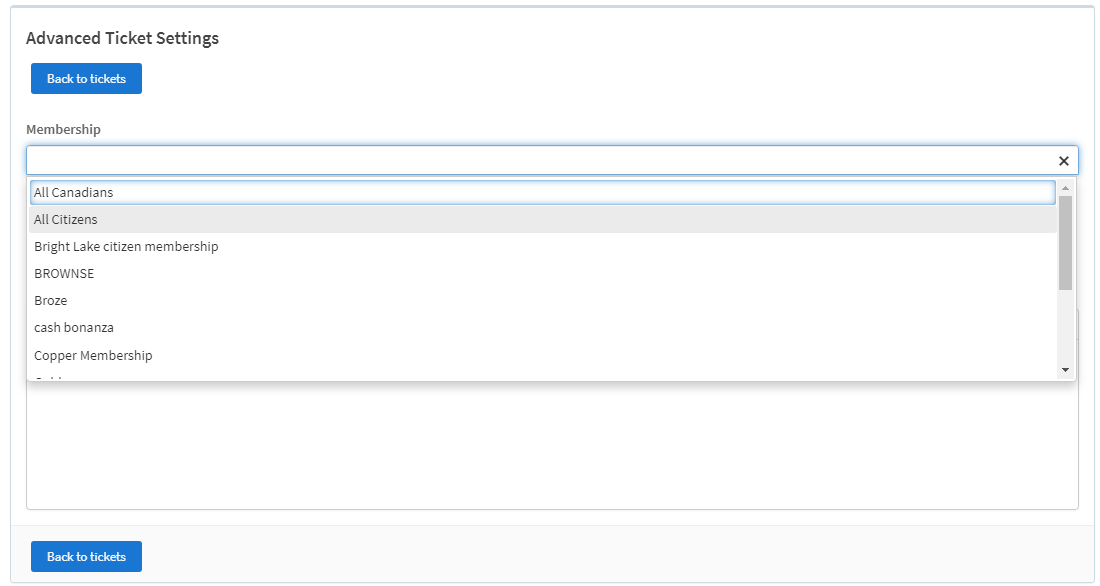
The Advanced option opens up a new pop up from which tickets can be assigned to certain memberships.
From this pop up you can indicate a discount-related person count and a cost. To use this function, pick an option using the buttons at the top and click the Add new record button. A row will be added to the grid and you can add the person count along with the cost. For an event, the selected discount can be given to the mentioned person count and for the mentioned cost. If it’s not necessary, click Delete. Click the Close button to close the pop up.
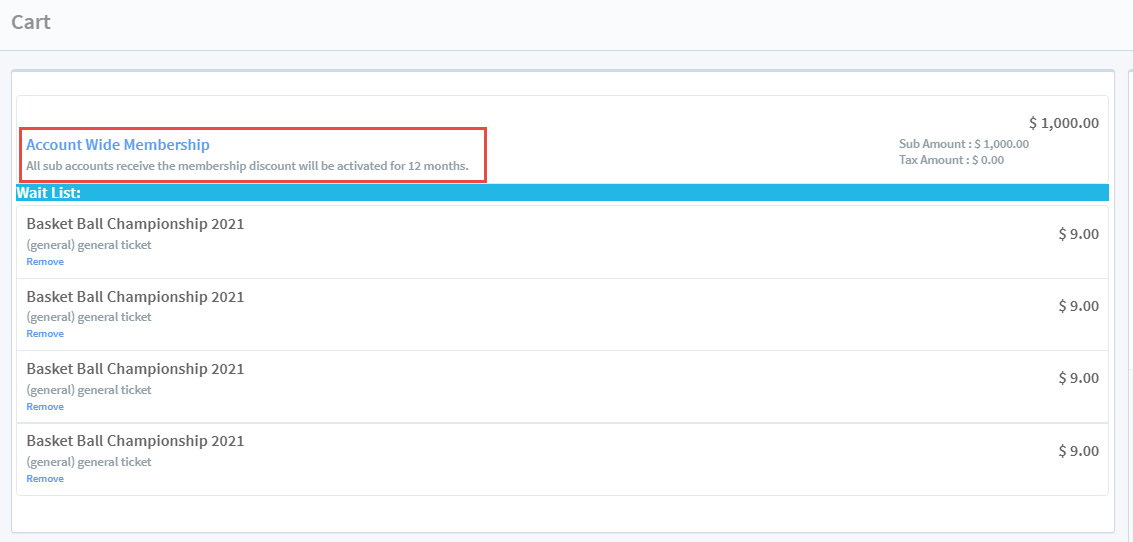
The Waitlist option in this grid allows a certain number of participants to be added as waiting for an event in case a ticket is cancelled. The quantity mentioned inline with each ticket will be the number of waiting participants allowed for an event. For example, if an event has 100 general tickets and 10 as the waitlist limit, after the 100 general tickets are sold 10 more participants can be added to the waitlist. These participants will get a chance to participate at the event only if an existing participant who has purchased 1 of the 100 tickets cancels their ticket. In this case, if a ticket becomes available the system will automatically add it to the cart and an email will be sent to the municipality along with a notification to the Financial user. Note that these tickets will be added to the cart along with the membership of the user.
The Complimentary checkbox is used to give away tickets via the POS System. Tickets with this checked will be sold or dealt with only in the POS System.
Next, you can select a ticket template and either Save, Preview, Make the Event Inactive, or Active.
The same set of buttons can be found at the top of the page.
Register for Events
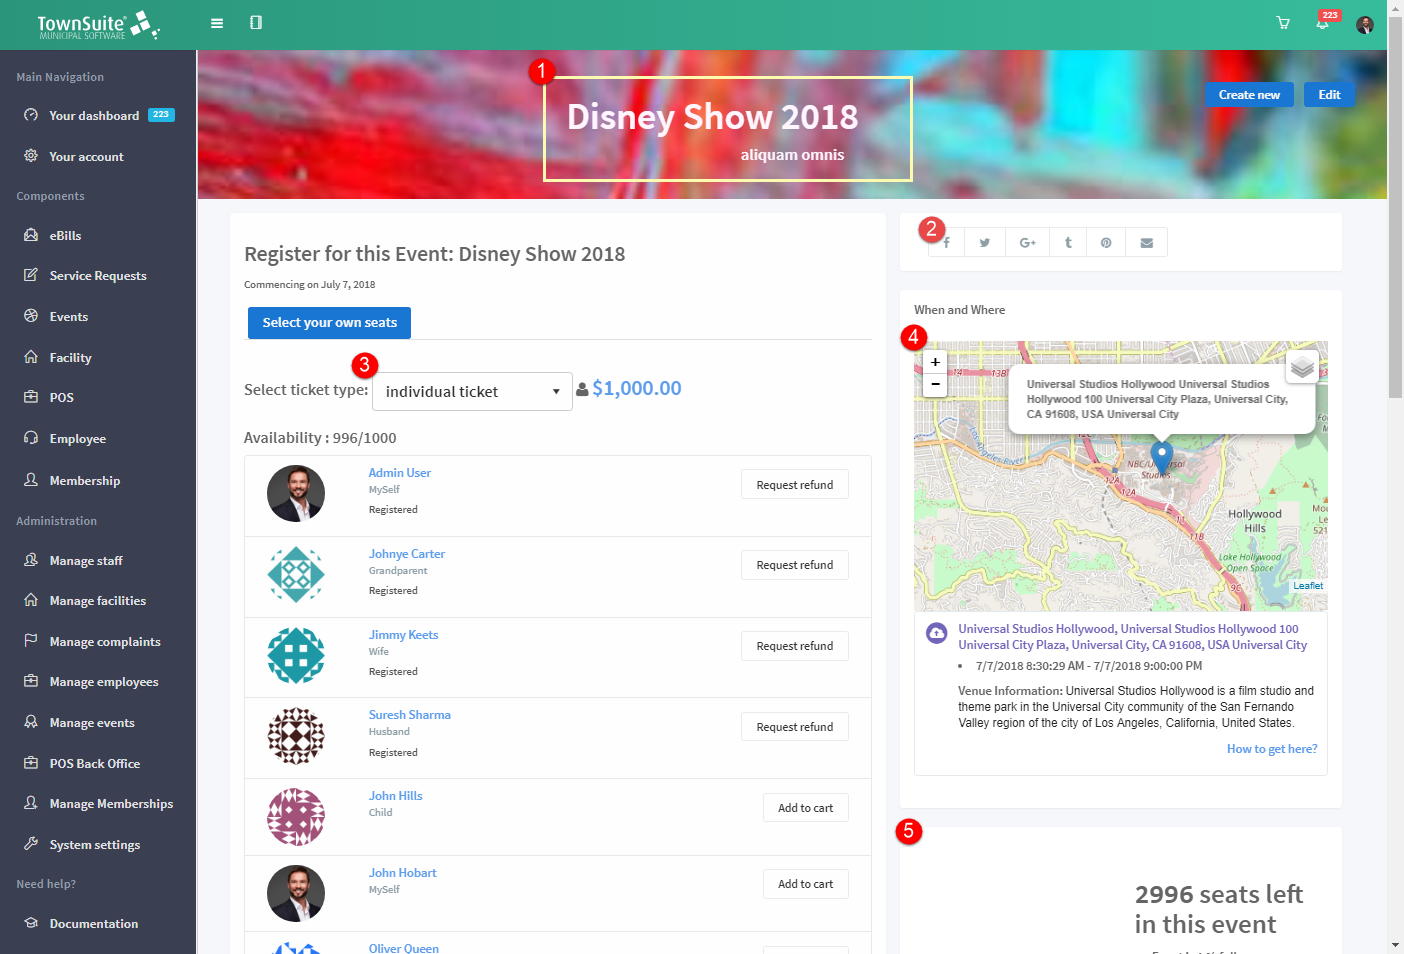
-
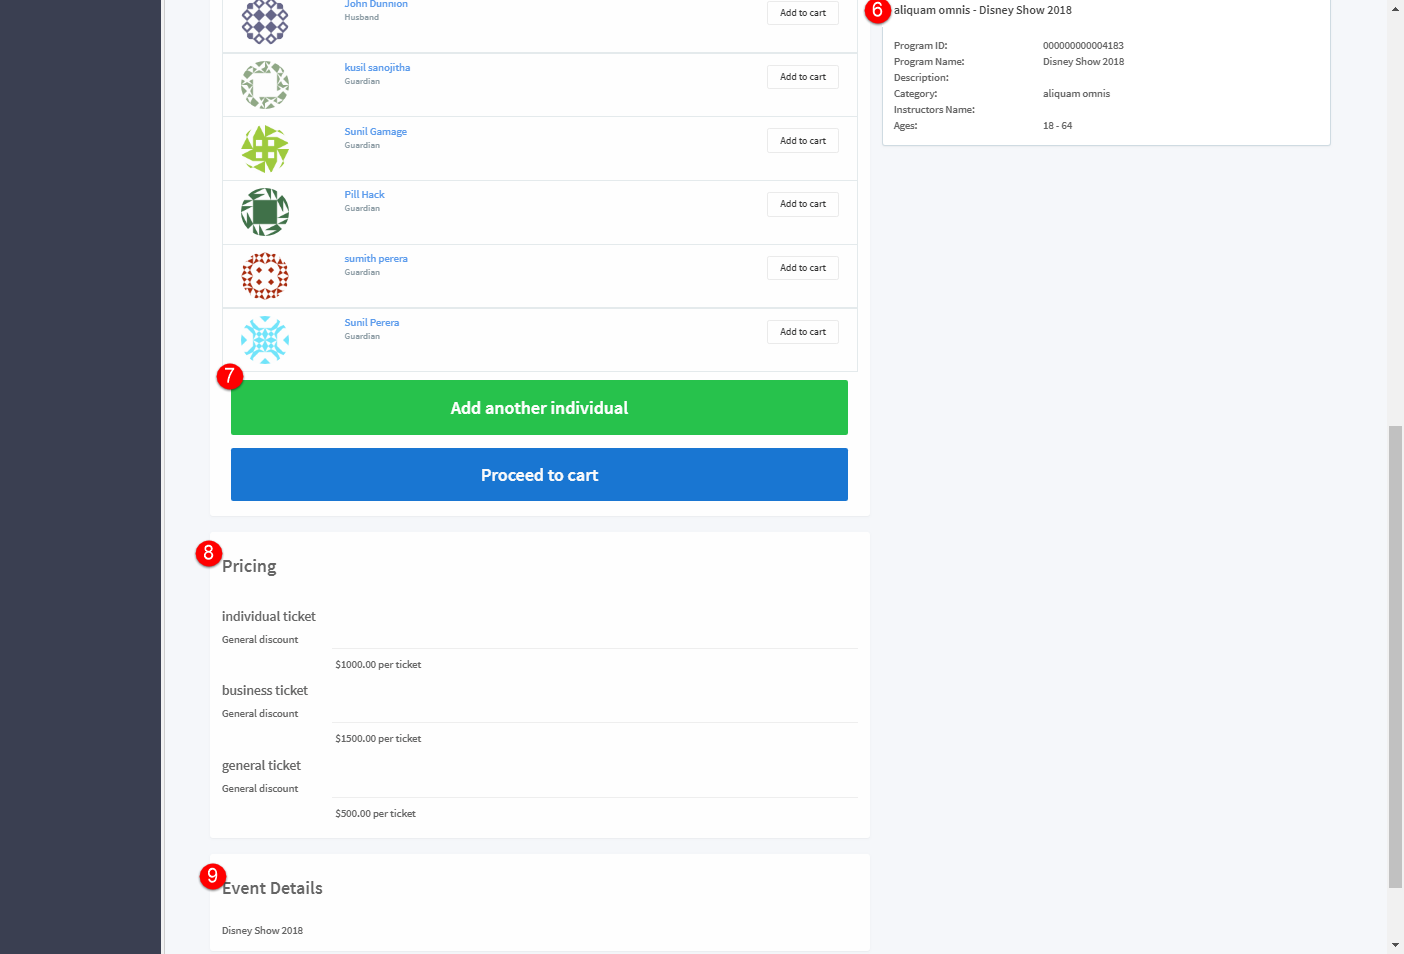
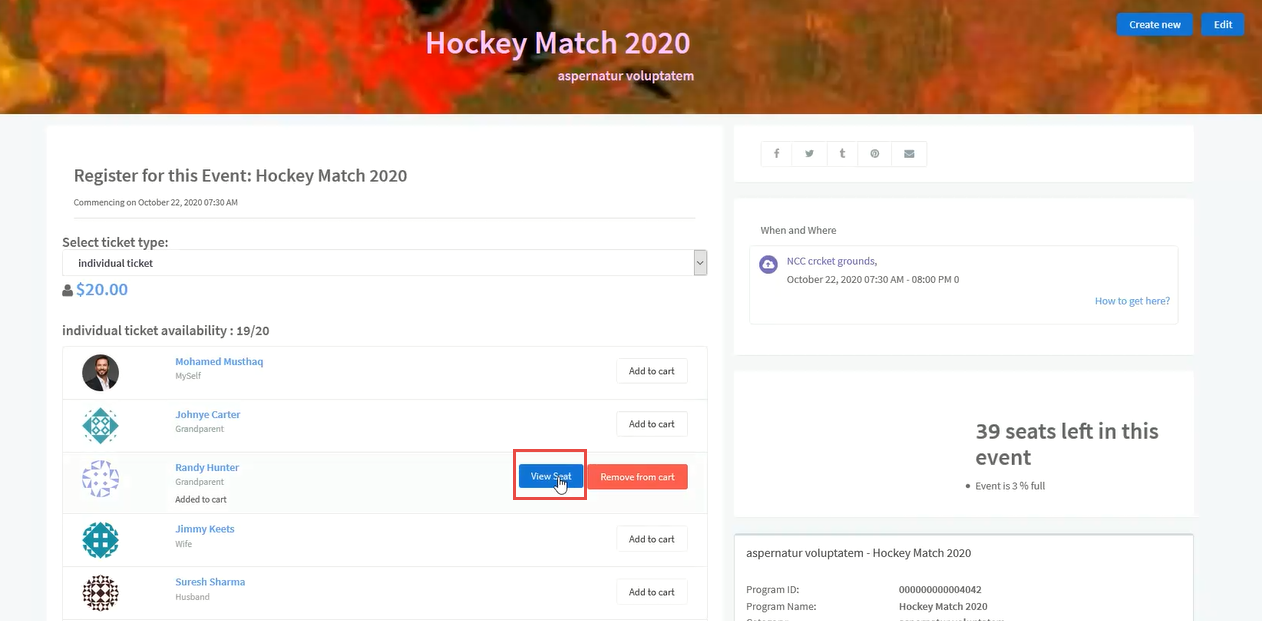
Displays the name of the event along with the category.
-
The page can be linked to any of these social media.
-
Select the ticket type. Individual or business ticket types have to be linked with an account which can be selected from the list below. General tickets can be purchased without a link to a person.
-
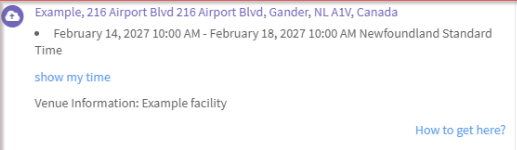
The Google map shows the location and How to get there? will show the direction (preferably on a GPS device). The date, time, and place of the event will be displayed below the map along with an option to view in the local time zone.
-
The number of available seats for the event.
-
Information related to the event.
-
The Add another Individual option lets you set up a sub account. This option is only available for Individual and Business tickets. In Business it would change to “Add another Business”.
-
The pricing including any discounts.
-
Any additional descriptions or documents related to the event will be shown here.
Note that if an event is setup for memberships in the Prerequisites Membership option, only the candidates with that membership can purchase tickets for that event.
In such a scenario, when a ticket is purchased, a pop up will appear for the membership.
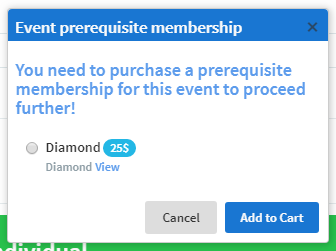
In other words, to purchase a ticket for that particular event, you would need to be a member of the membership group linked to that event from the Prerequisites Membership dropdown.
If the membership option is selected from the pop up, both the ticket and the membership fee will be added to the cart. If the ticket is purchased from the waitlist, both the ticket and the membership fee will move to the cart as a waitlist. Both of these (ticket and membership fee) will be removed from the cart once the event takes place.
Note that when the Add to Cart, Request Refund, or Remove from Cart buttons are clicked, a spinning loader will appear until the requested action takes place to prevent the user from multiple clicks.
Register for Events with a Configured Seating Chart
At the ticket purchase, the participant can view the seating chart by using the View Seat button.
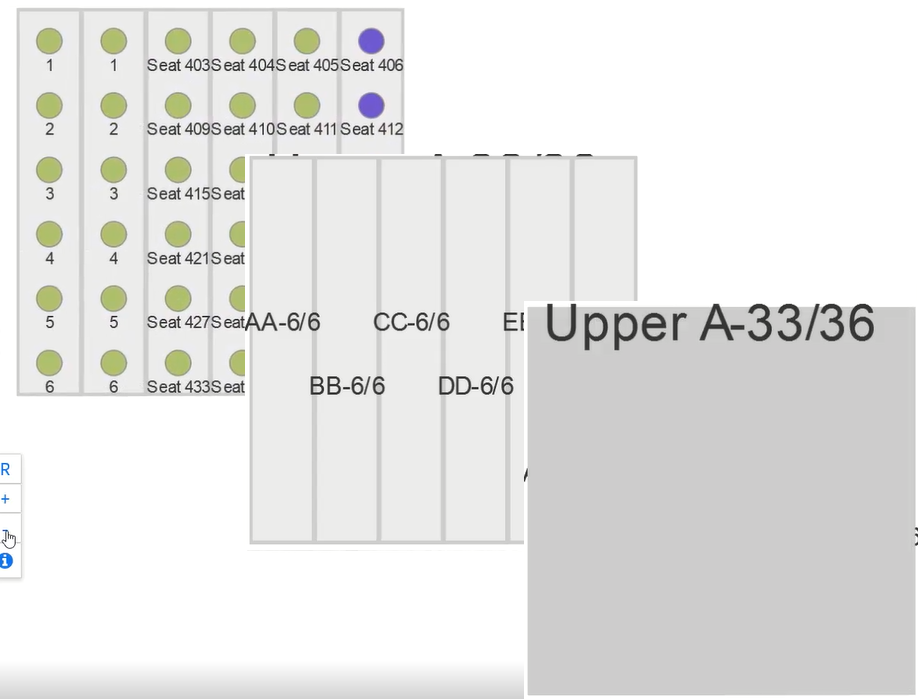
The seating will appear as follows:
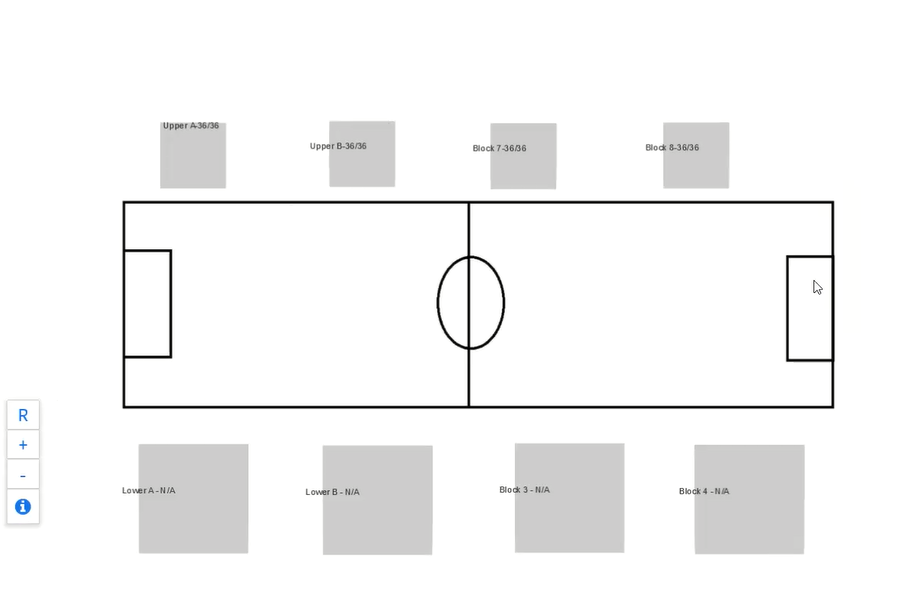
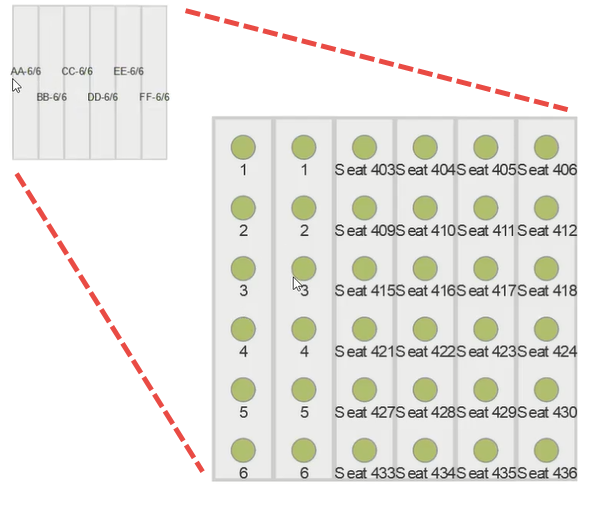
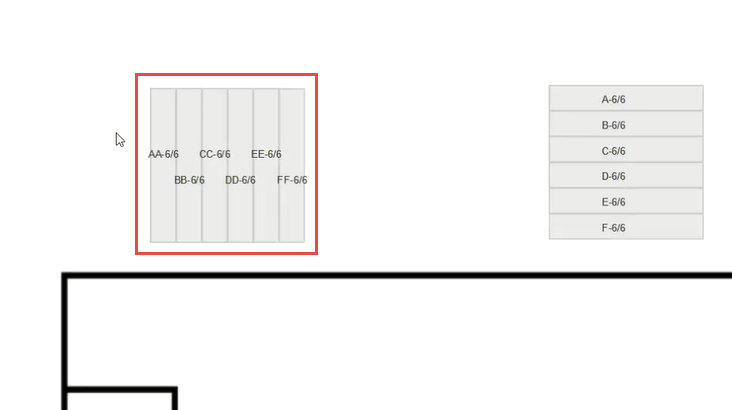
You can zoom into each block to view your seat using the scroll in the mouse.
All the changes made in the configuration will appear here. For example, in the configuration above we changed the rows of a block to be vertical and those rows appear vertical in this page.
-
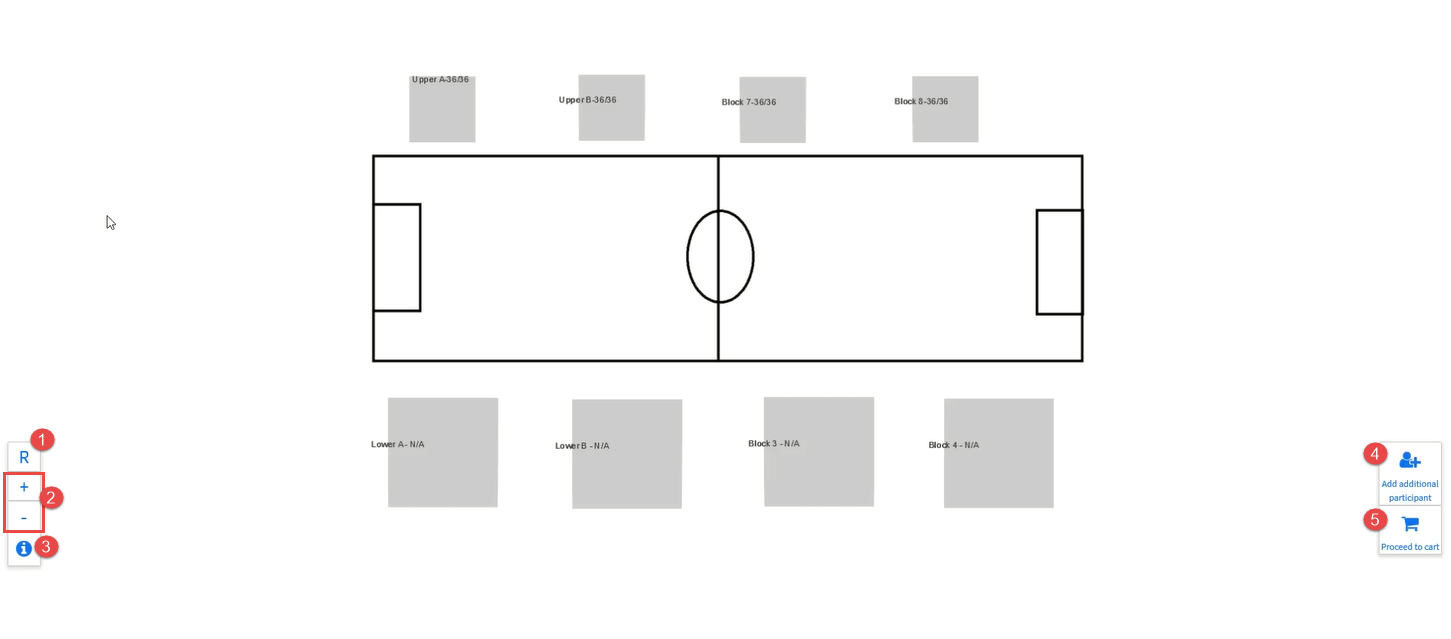
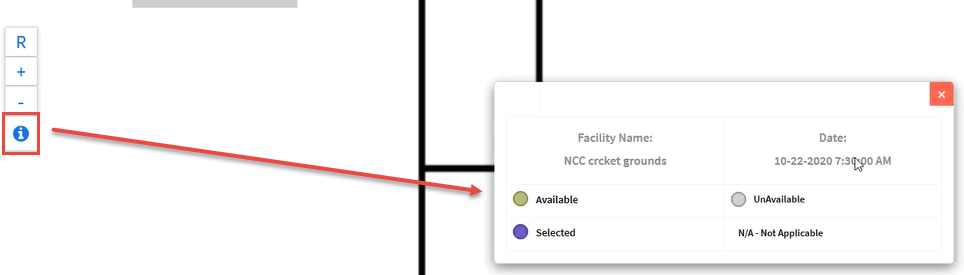
The R button resets the screen to the original un-zoomed image.
-
Used to zoom in and zoom out of the seating arrangement. Here the outer image will remain the same and within that, the seat information will be zoomed in and out.
-
The information icon displays information such as the facility name, date, and the seat legend.
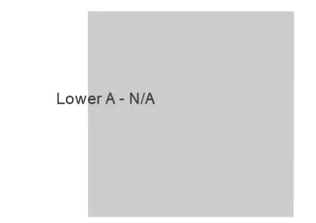
- Depending on the ticket type some blocks will not be applicable and those will be marked N/A. For example, if the participant selects general tickets and a certain block has no tickets allocated for general it will be shown as N/A.
- The Add additional participant button goes back to the event page where new participants can be added.
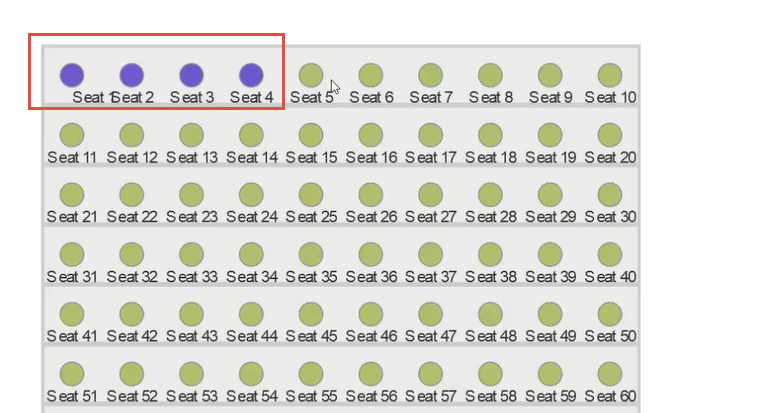
The selected seats will be highlighted on the chart.
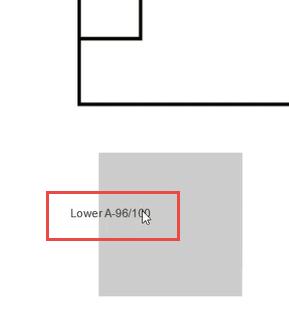
When zoomed out the block will display how many tickets are remaining after the purchase. For example, when four tickets have been purchased out of the 100 remaining number of seats will be displayed as follows:
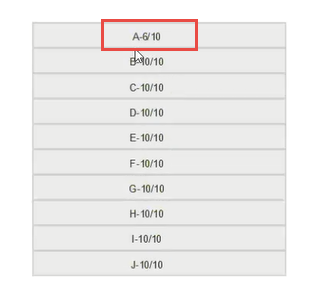
In the same zoom out feature, the ticket purchased can be viewed row wise as well.
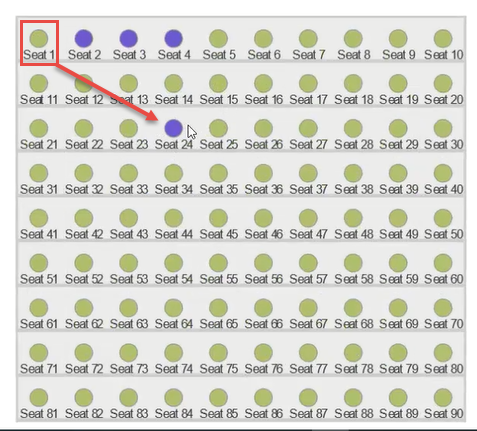
Furthermore, it is possible to click and change the seats. It will be shifted in the existing order. For example, initially when seat 1, 2, 3, 4 are selected, and the user clicks ‘Seat 24’, ‘Seat 1’ will move to ‘Seat 24’. Then, ‘Seat 2’ will move to the next seat which will be clicked and so on.
The seat number and the block number will appear in the Remarks column of the financial receipt.
- The Proceed to cart button proceeds to the check out process. Note that this button will not appear if the user has not logged in to the system.
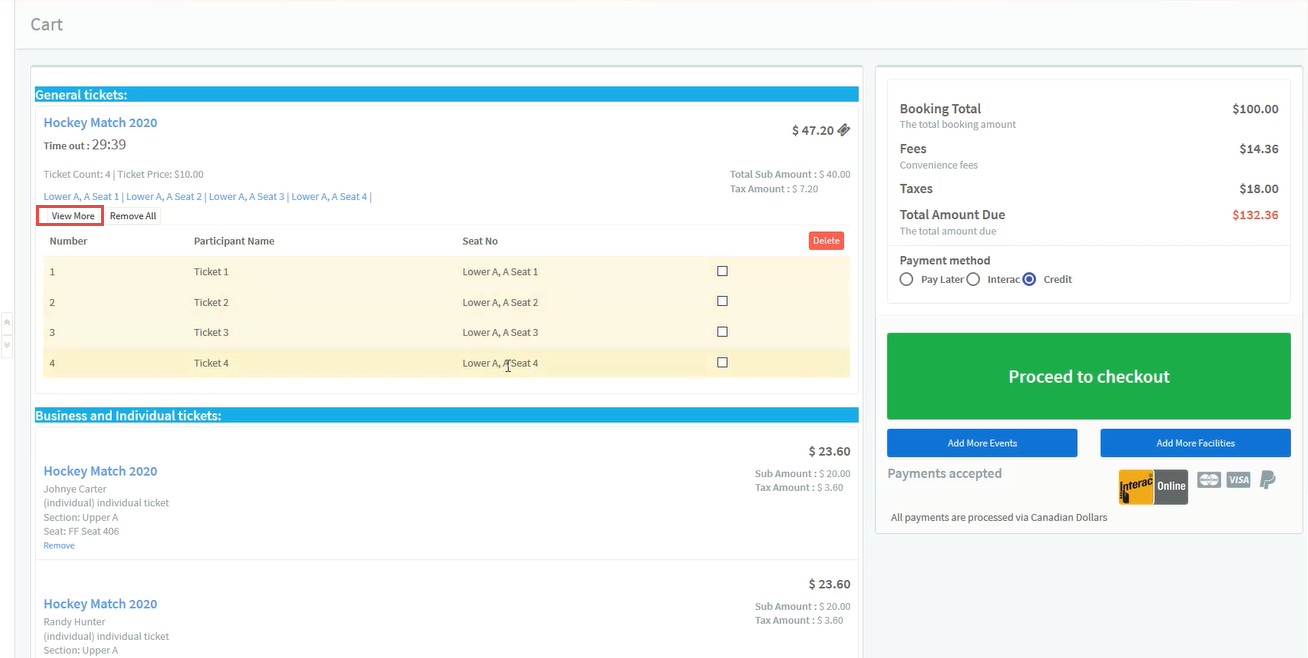
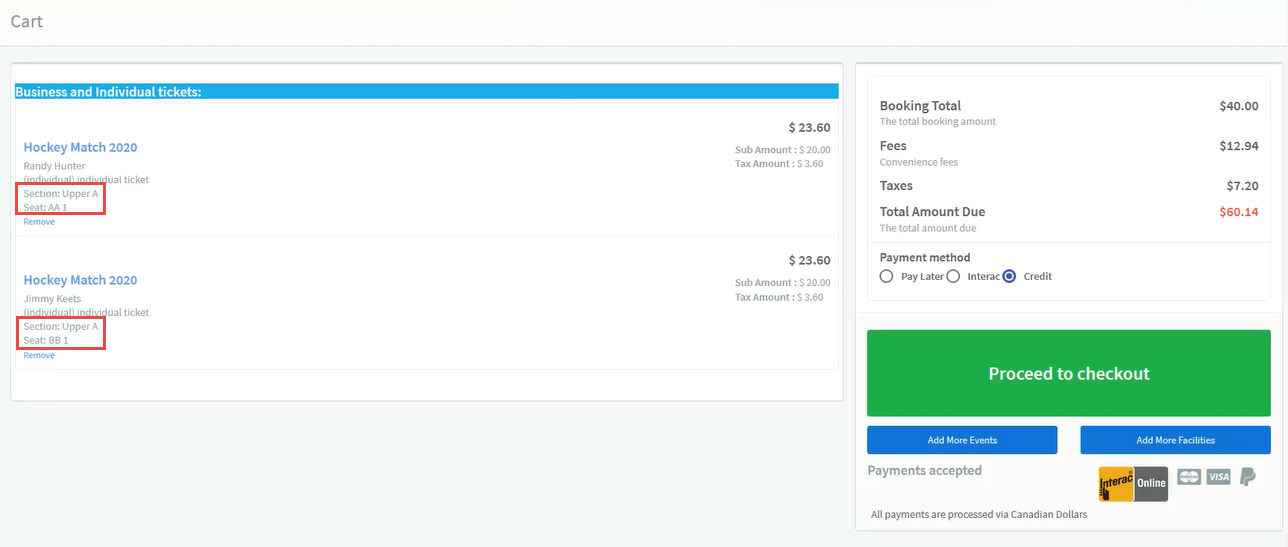 The cart item will display the selected seat numbers as shown above.
For general tickets, the user can click View More in the cart and select/delete tickets out of the list and then proceed to checkout.
Note that the Proceed to Cart button will not be available if the user has not logged in.
Also note that, if a ticket has been purchased for a sub account, the email will contain both the account owner’s email address and the sub account holder’s email address.
When the user makes the payment, the Financial user will be notified.
Additional Info
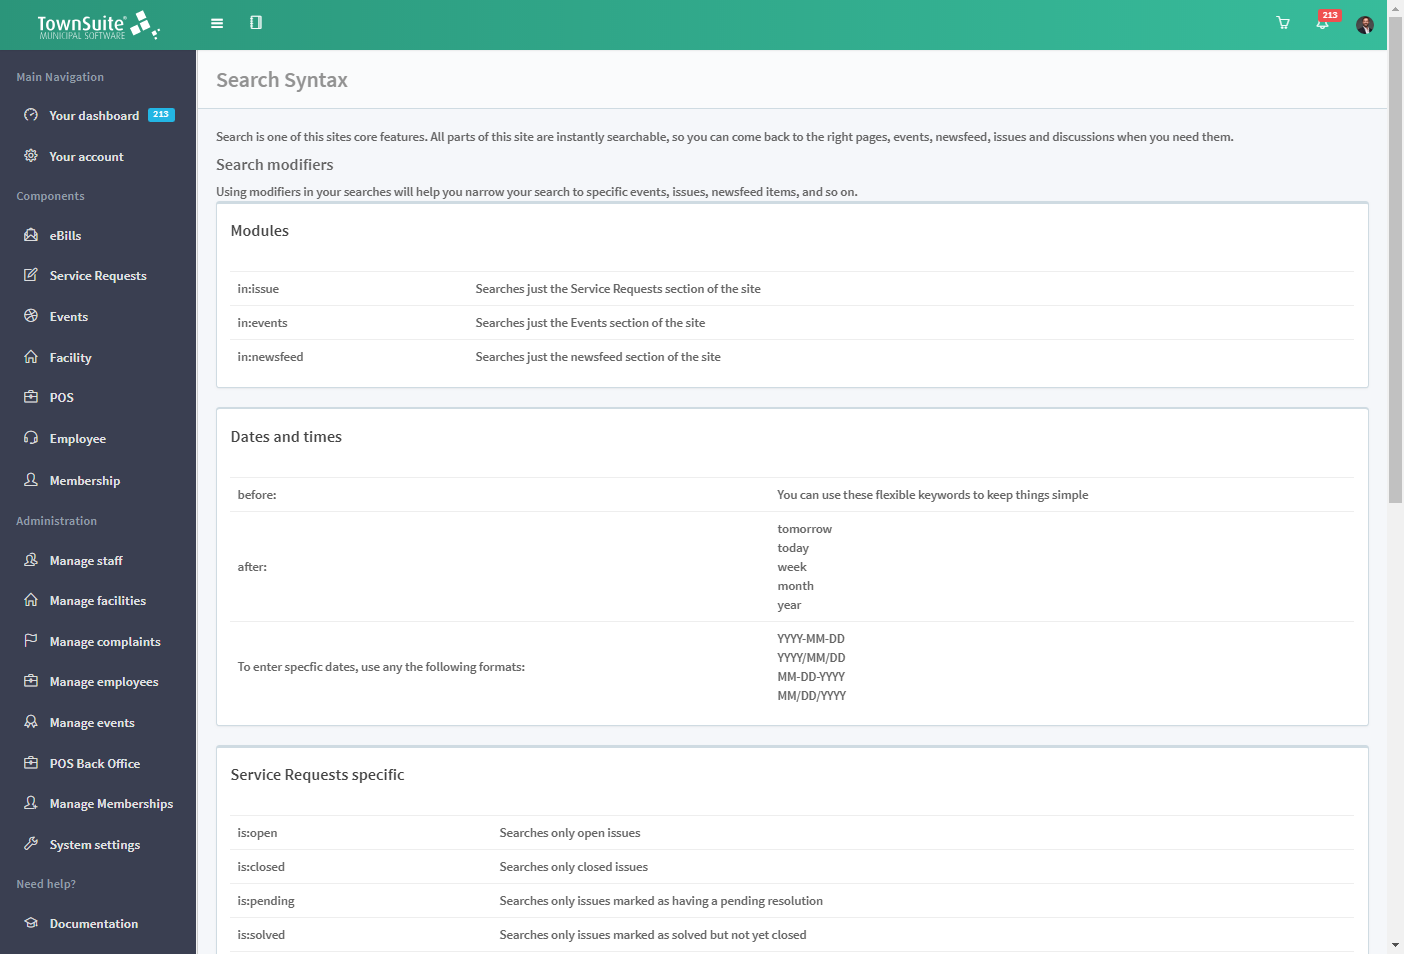
The user can incorporate search syntaxes that are mentioned in the search syntax page to refine the search in the Search bar.